Configuring WooCommerce Settings
On this page, we’re going to walk through all settings available to you in WooCommerce to help configure the WooCommerce settings. You’ll find information about General WooCommerce settings as well as Product, Tax, Payments, Shipping, Accounts, Email, API, and Webhooks.
To get started, go to WooCommerce > Settings.
General Settings
Store address
Defines your shop’s address country and state (i.e., where you are based as a seller). It determines default tax rates and customer locations.
General options
Selling Location(s)
Choose to sell to all countries or to specific countries. You can choose multiple specific countries or states.
Shipping Location(s)
Choose to ship to only those countries you sell to or a subset of countries. You can disable shipping & all shipping-related functionality.
Default Customer Address
Choose the location we assume site visitors are in, before they enter it, to calculate tax and shipping.
- Shop base address tells the system to assume they are in the same location as your shop.
- No address gives them no location, so no taxes are calculated until they provide an address.
- Geolocate address verifies where their current location and calculate taxes accordingly.
- Geolocate with page caching support is the same as above, but does the geolocation via Ajax. You may notice your website URLs have a ?v=xxxxx appended to them. This is normal to prevent static caching of prices.
Enable Taxes
Enable or disable taxes on your store. Disabling taxes hides the tax settings page.
Enable coupons
Enable or disable coupons on your store. Coupons can be applied from the admin edit order screen (for unpaid orders), cart and checkout pages.
- Enable the use of coupon codes – Select to enable the use of coupons in your store.
- Calculate coupon discounts sequentially – Changes the coupon calculation logic to apply coupons in sequence on top of one another, rather than basing them on the original product prices.
Currency options
Options that affect how prices are displayed on the frontend.

Currency
Choose the default currency for the store. Only one may be selected.
Currency Position
Choose the default currency position for prices: Left, Right, Left/Right with space
Thousand Separator
Choose the symbol to use for the thousand separator: 1,000 or 1.000
Decimal Separator
Choose the symbol to use for the decimal separator: 100.00 or 100,00
Number of Decimals
Choose how many numbers to display to the right of the decimal when displaying prices: 100.00 or 100
Product Settings
Settings for products and how they are displayed, including image sizes, inventory and downloadable product settings.
General
In the General section are Shop Pages, Measurements and Reviews, allowing you to control checkout settings, select units of measurement, and enable/disable product reviews and ratings.
Go to: WooCommerce > Settings > Products > General:
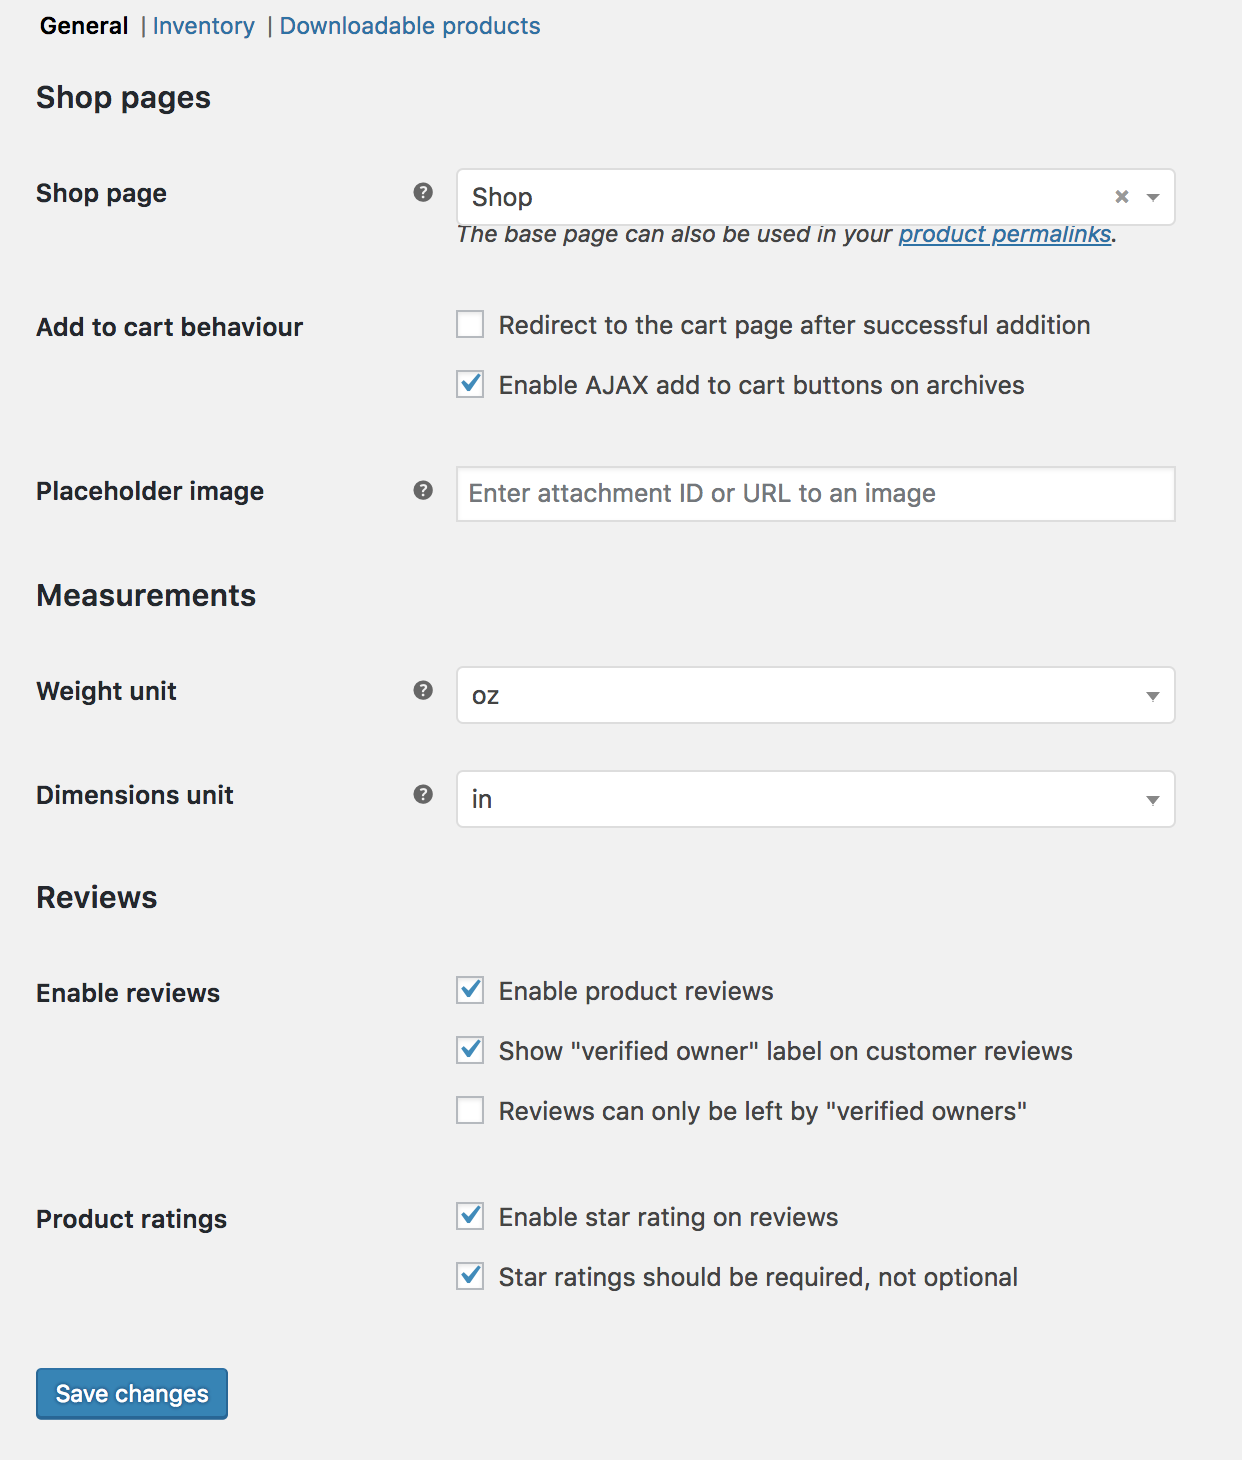
Shop pages
Shop Page
Select what page you want to be the default shop page. Need not be the Shop page that WooCommerce installed, or can be skipped if you use another method to display products.
Add to cart behavior
- Redirect to cart page after successful addition – Automatically takes the customer to the cart page upon adding a product.
- Enable Ajax add to cart buttons on archives – Adds the ‘Add to Cart’ option to shop archive pages.
Placeholder Image
Set a default ‘placeholder’ image to appear on the front end when no other image is available. This could be your brand logo or an image of a signature product or service.
Measurements
Select a unit of measurement for weight and dimension of products from the dropdown.
Reviews
Enable Reviews
- Enable product reviews
- Select whether to display if the reviewer bought the product
- Control if anyone can leave a review or only buyers
Product Ratings
- Enable stars on reviews.
- Select whether it’s required or optional
Inventory Options
To edit your shop’s inventory options, go to: WooCommerce > Settings > Products > Inventory.
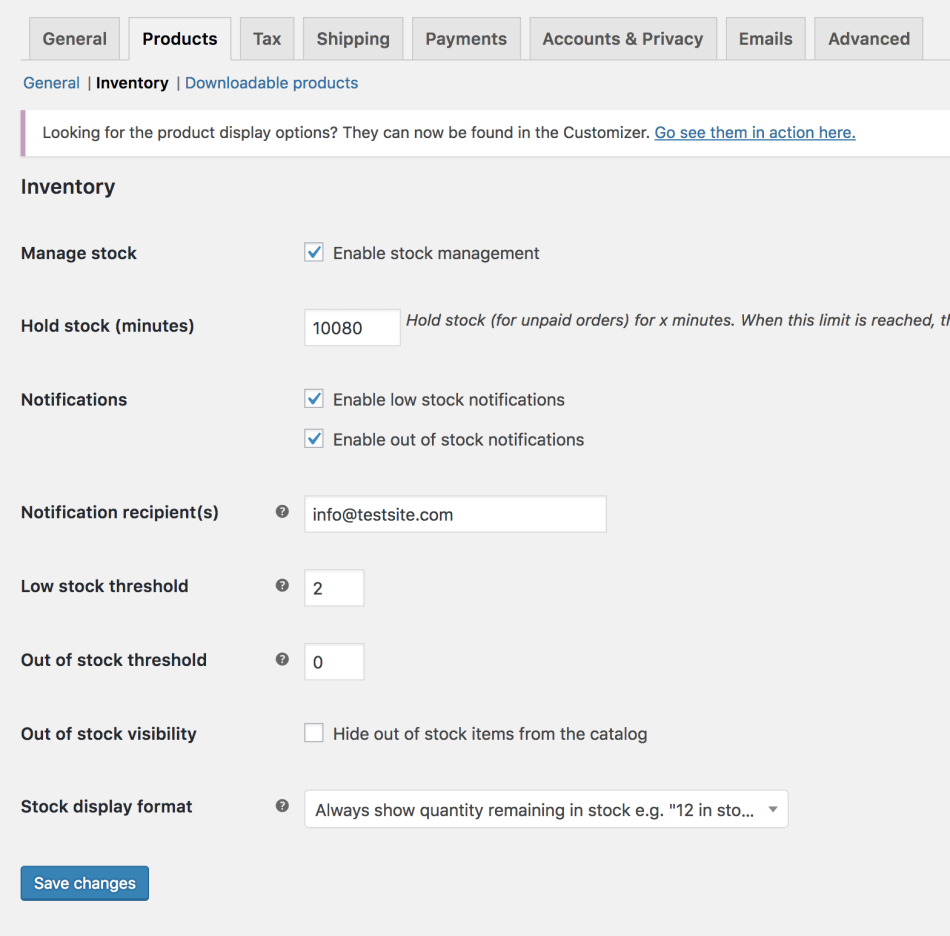
Choose whether to enable stock management. If selected, you have these options:
- Manage stock
- Enable stock management – Inventory for physical products is auto-managed. You enter quantity, and WooCommerce subtracts items as sales are made, displaying: Stock, Out of Stock or On Backorder. More info at: Stock Management Improvements.
- Disable (box left unticked) – Inventory and status for physical products must be entered manually. You can still Enable Stock Management on a per-product level if desired. More info at: Managing Products.
- Hold Stock (minutes) – Hold products (for unpaid orders) for X minutes. When limit is reached, the pending order is canceled. Leave blank to disable.
- Notifications
- Enable low stock notifications
- Enable out of stock notifications
- Notification Recipient – Enter email address for notifications.
- Low Stock Threshold – Number of products to trigger low stock notification
- Out Of Stock Threshold – Number of products to trigger out of stock status.
- Out Of Stock Visibility – Choose to hide out of stock items from catalog.
- Stock Display Format
- Always show stock – “12 in stock”
- Only show stock when low – “Only 2 left in stock” vs. “In stock”
- Never show amount
Downloadable Products

Go to: WooCommerce > Settings > Products > Downloadable products.
File Download Method
Controls how your store provides downloadable files to purchasers.
- Force Downloads – Files are ‘forced’ to download via a PHP script. Files are not accessible to anyone but purchasers, and direct links are hidden.
- X-Accel-Redirect/X-Sendfile – Similar to ‘forced’ above, but it has better performance and can support larger files. It requires that your hosting provider supports either X-Sendfile or X-Accel-Redirect, so you need to check with them first.
- Redirect only – A download URL links the user to the file. Files are not protected from outside access.
Most stores should use one of first two methods to keep files safe from outside access. Redirect should only be used if you encounter problems or don’t mind downloads being non-secure.
Access Restriction
- Select if downloads require login – Does not apply to guest purchases.
- Grant access to downloadable products after payment – Enable to grant access to downloads when orders are Processing, rather than Completed.
Tax Settings
Go to: WooCommerce > Settings > Tax.
Taxes are very important and complex enough that we’ve written more about them in their own section of our docs. More at: WooCommerce Tax Settings.
Shipping Settings
Go to: WooCommerce > Settings > Shipping.
The main shipping settings screen is for Shipping Zones. Think of a shipping zone as a geographic region where a certain set of shipping methods and their rates apply.
You can read about setting up shipping zones at: Setting up Shipping Zones
Shipping Options
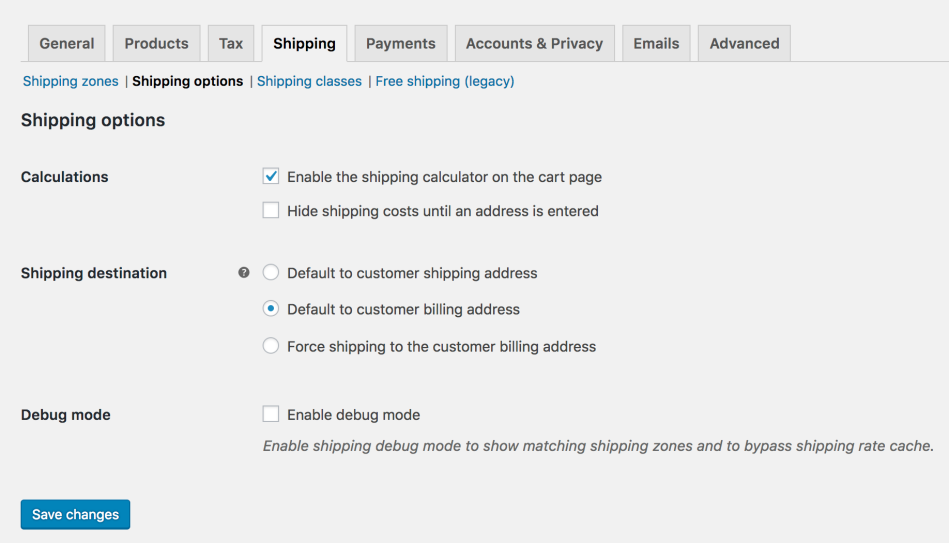
Shipping Calculations
- Enable the shipping calculator on the cart page
- Hide shipping costs until an address is entered
Shipping Destination
Ship to billing address or customer shipping address by default or only ship to the user’s billing address.
Debug Mode
Enable for troubleshooting purposes.